Before jumping into code and Dialogflow console, let us understand what we are trying to achieve with this blog today.
Voicebot is an AI-powered software that allows users to interact using voice without any other form of communication like IVR or chatbot. Voicebot uses Natural Language Processing (NLP) to power its software. Today, we are going to use Dialogflow by Google to understand how one can make such a Voicebot.
Google’s Dialogflow is an NLU (Natural Language Understanding) platform, which offers a conversational user experience.
With Dialogflow, we can design various conversational flows. It comes with building blocks like Agents, Flows, Pages, Entity Types, Parameters, Forms, Intent, Webhook, Fulfillment, Integrations.
In this article today, we will build a conversational Voicebot system to order coffee. Following is an example conversation that may happen:
Customer: Hi
Voicebot: Hey, how can I help today?
Customer: Can you get me a coffee, please?
Voicebot: Sure, we offer the following coffees, can you share which would you like?
- Espresso
- Americano
- Latte
- Cappuccino
- Macchiato
Customer: I would like to have an espresso
Voicebot: We offer the following toppings with an espresso, would you like us to personalize it for you?
- Honey
- Cinnamon
- Butter
- Cardamom
- Chocolate Syrup
Okay! Let us cook it together!
Ohh! Wait… Before we jump on Dialogflow, it comes with two versions
- Dialogflow CX - Advanced agent type - suitable for large or very complex business needs.
- Dialogflow ES - Standard agent type - suitable for small and simple business needs.
Let’s not underestimate our business need for coffee ordering and go with Dialogflow CX. This can be just a small part of the whole menu offered by a cafe or a restaurant.
If you are curious to know more about both the versions of Dialogflow, checkout head-to-head comparison on Google’s documentation:
Create Project and Agent in Dialogflow
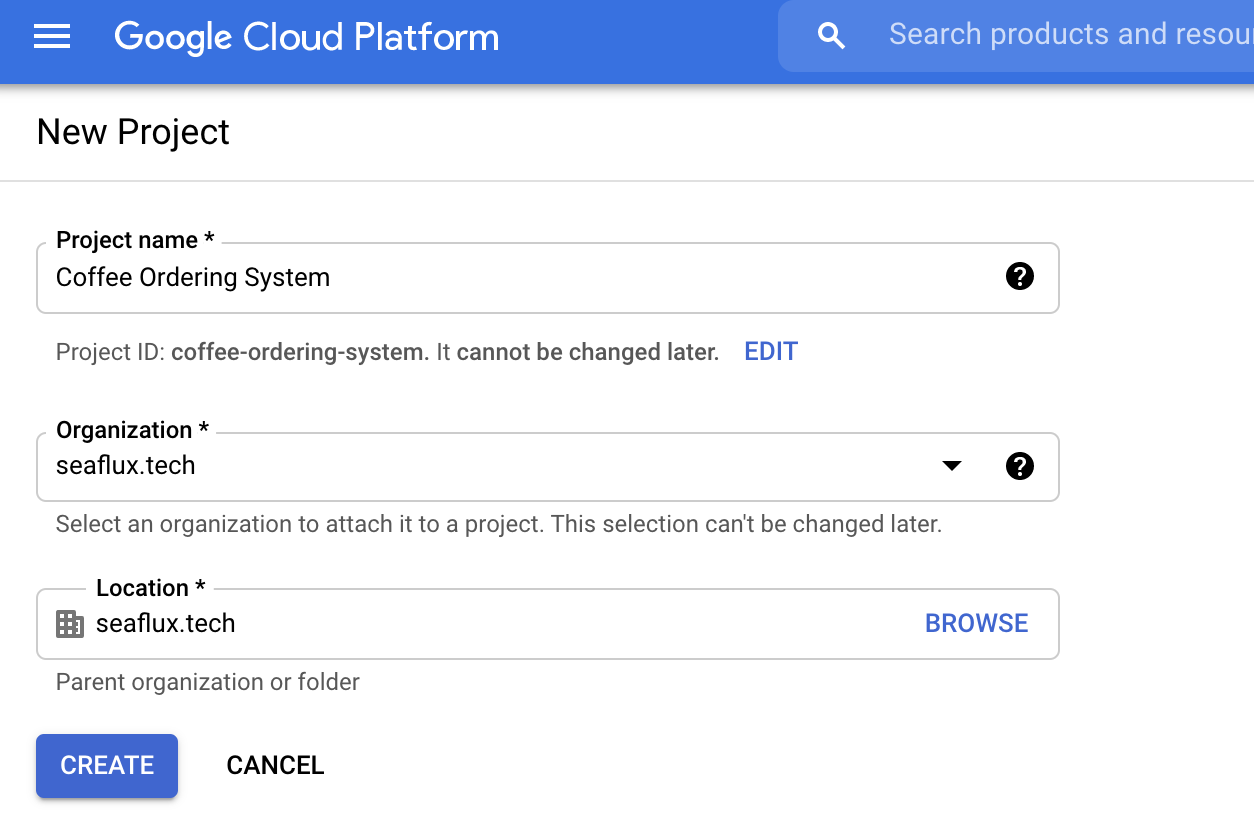
Okay, let’s head on over to the Dialogflow CX console and create a new project.
Click Create button and go back to the CX console, you should be able to find your newly created project.
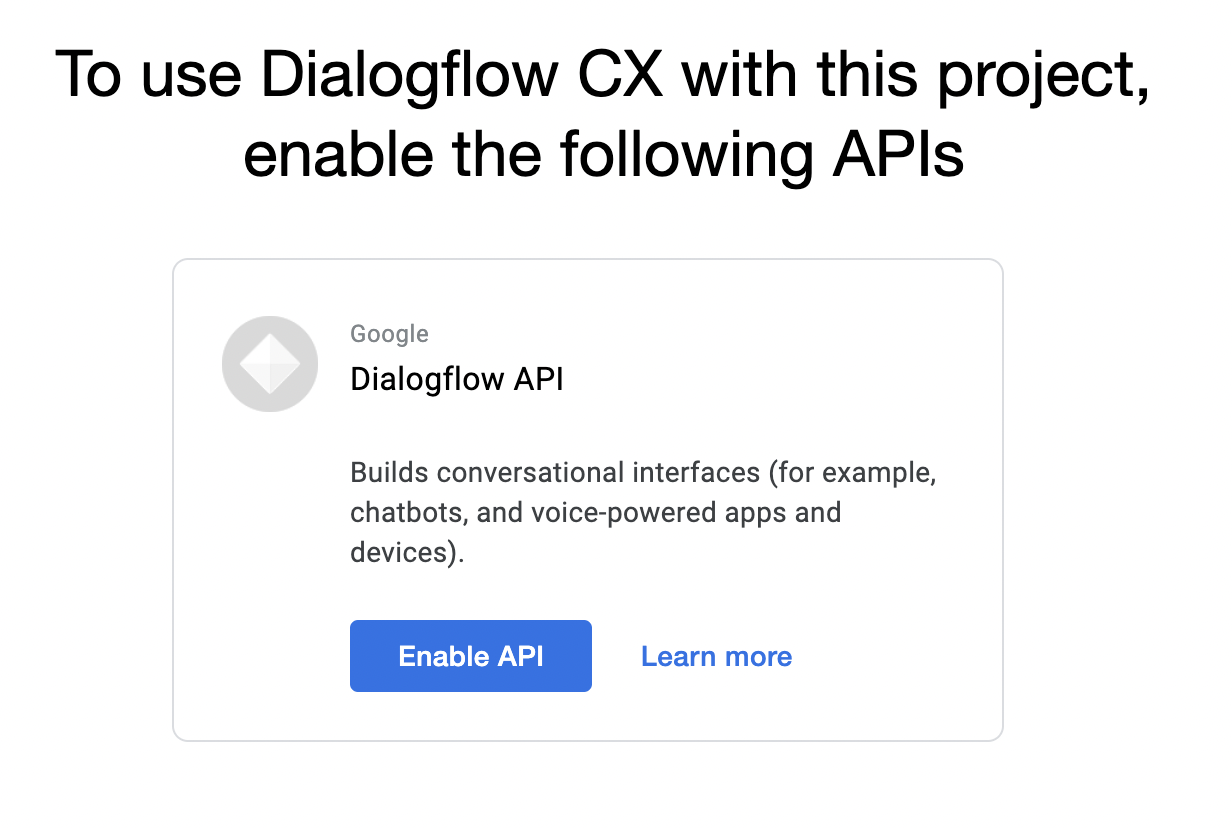
When you access your project for the first time, it will ask you to enable the Dialogflow API for your project.
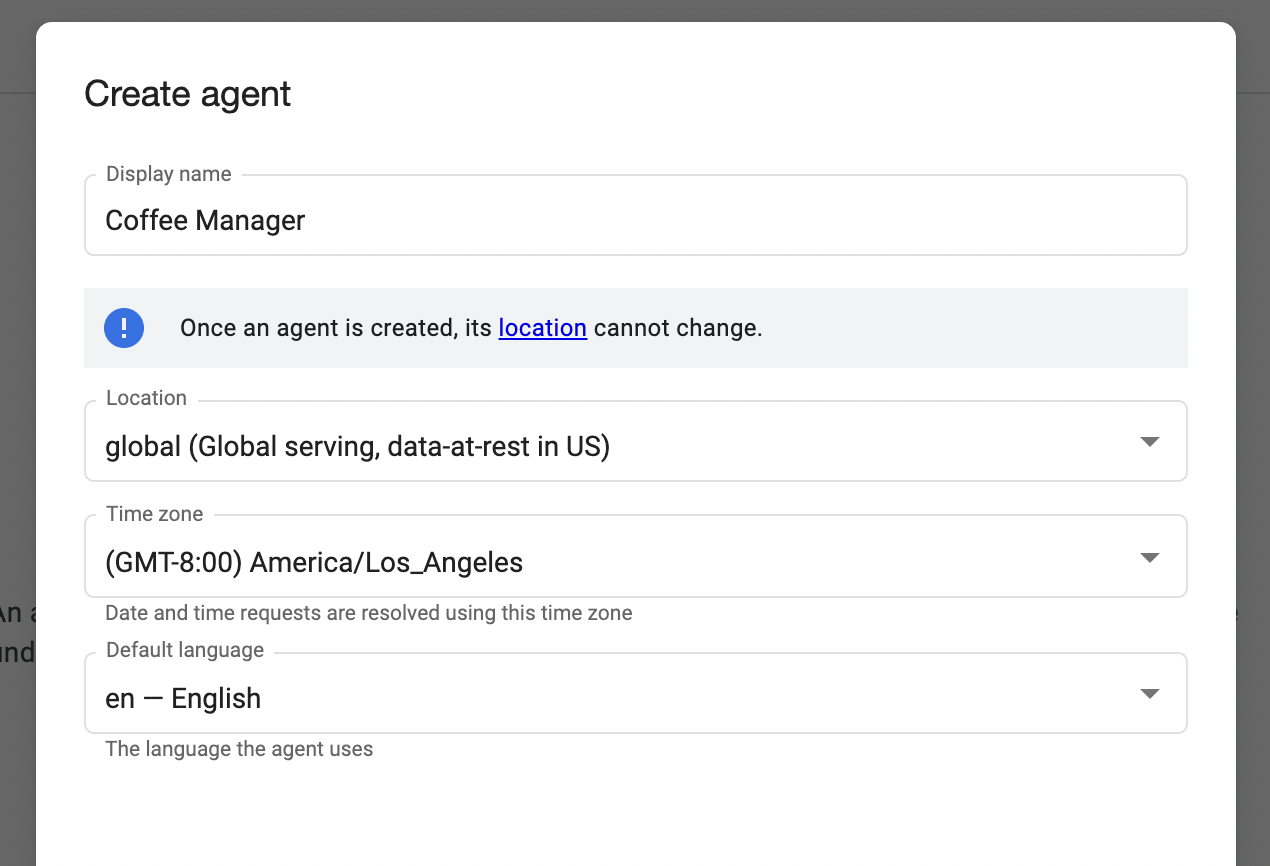
Once the permission has been granted, the next step is to create your first agent. Ideally, you should choose a location near your targeted user base.
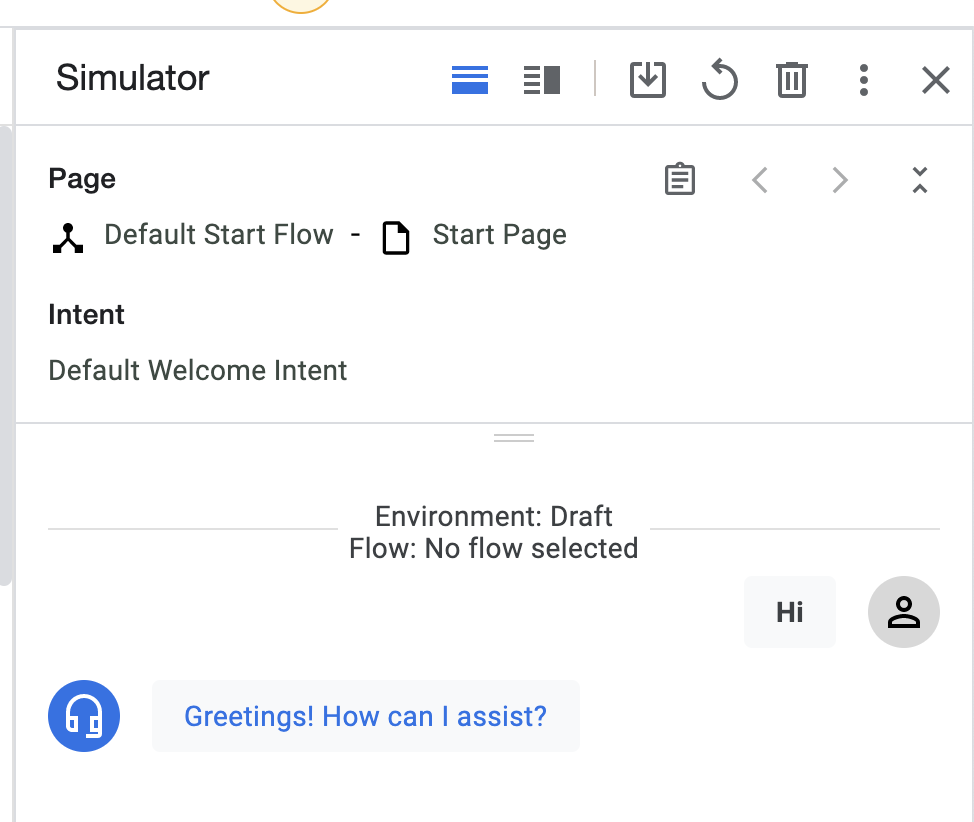
By default, the Agent comes with a start page, which reacts to the greetings. So let’s give it a try to see that in action by clicking on the top-right corner “Test Agent” option.
Identify Entities and Training the same
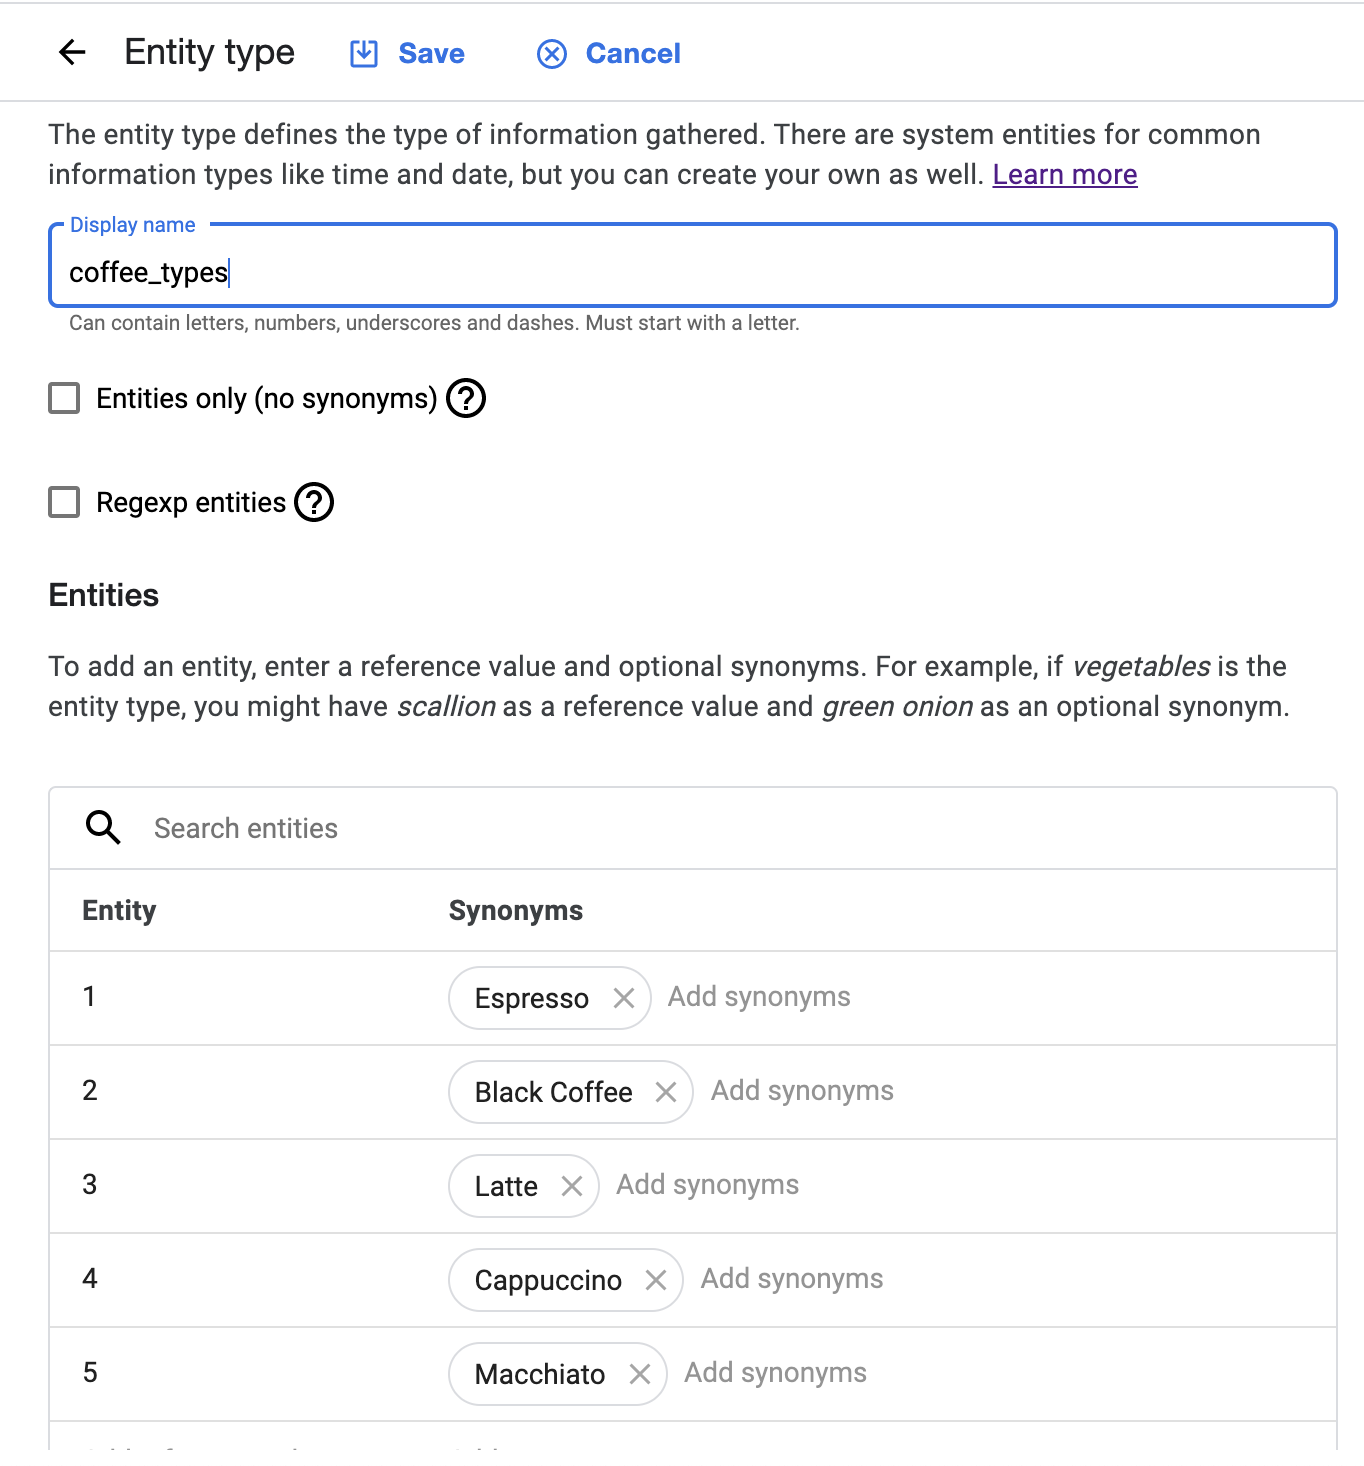
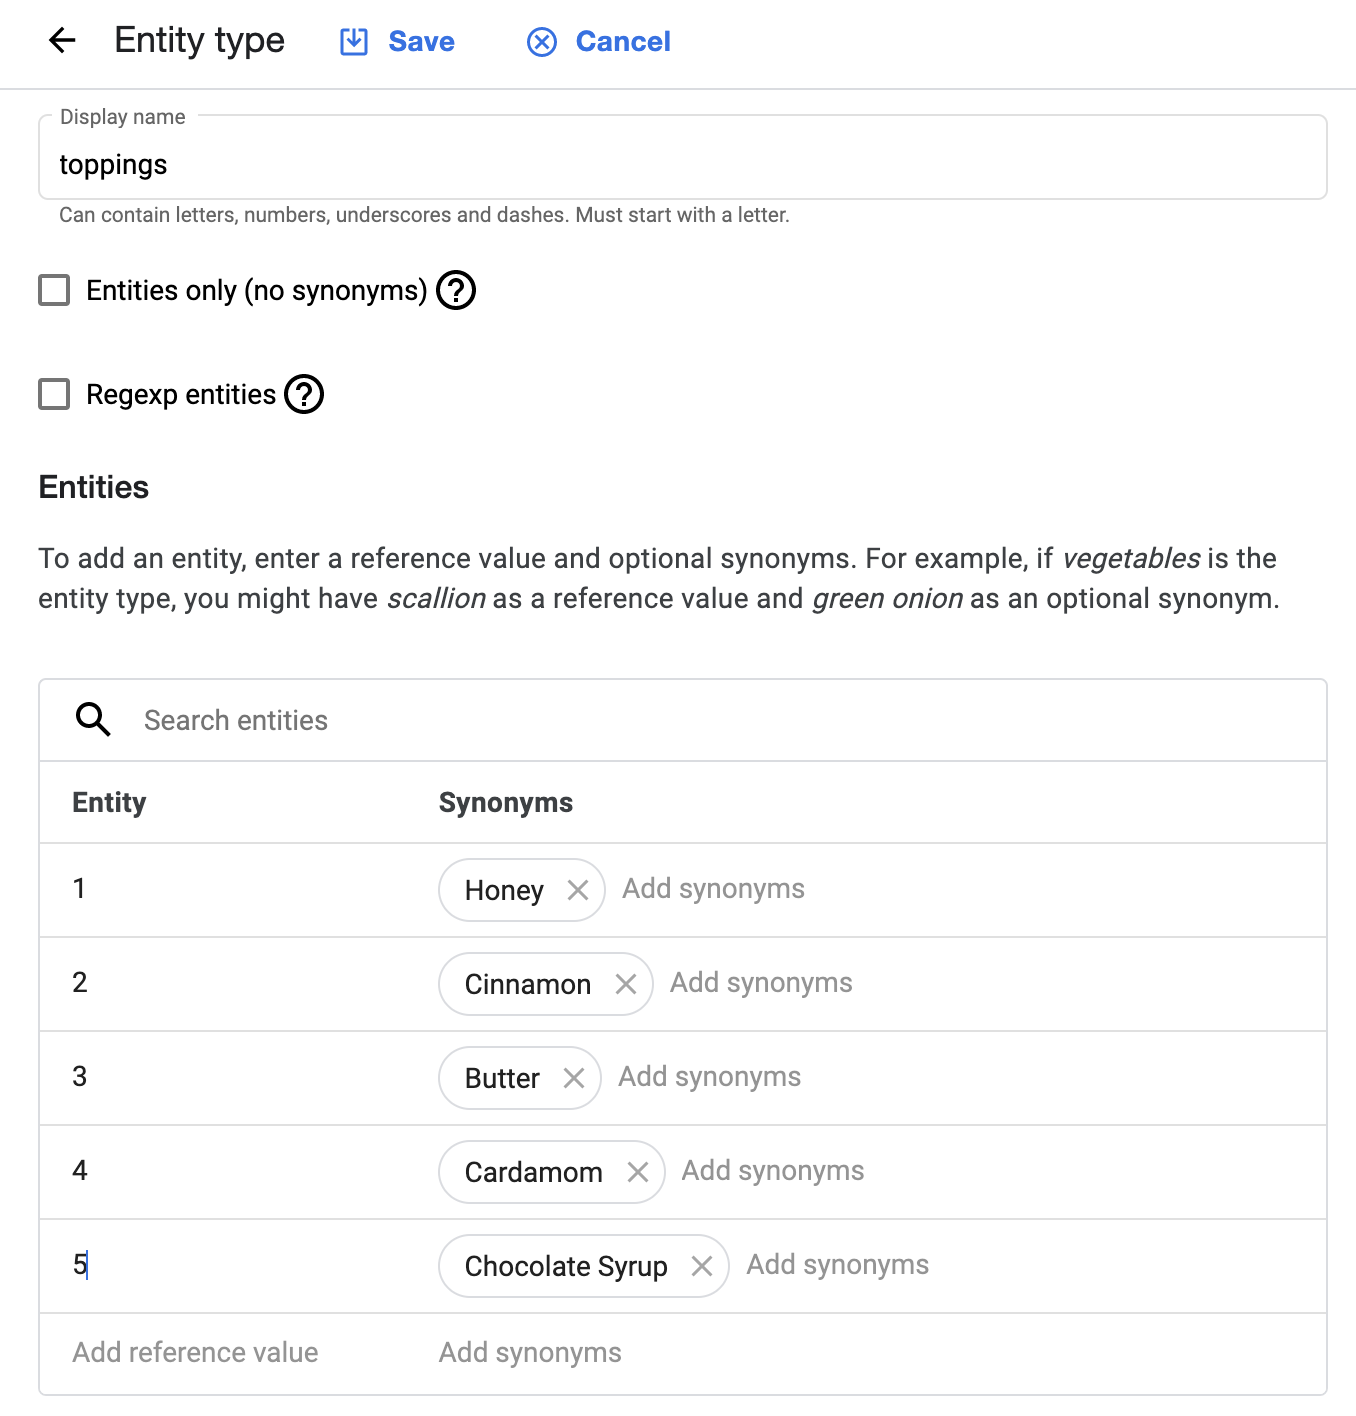
For our requirements, we will be needing the following entities.
- Coffee Types
- Toppings
You might be wondering why I have given Entity as 1, 2, 3, 4, 5? The reason behind that is when you place an order, it's not a good practice to give the string i.e. “Espresso” to your backend, as your backend needs to look up using string to identify the unique ID. Instead, if you use that unique ID as Entity, it will send that value as a parameter to the backend when placing an order, which will be much faster and accurate. We will see that in action in the following sections.
Create flows
Flows are like reusable code! In programming, we used to keep our reusable code in separate files/modules. Similarly, while identifying Flows, you should keep the same thing in mind, Flows should be logically separated from each other, that can be reused if needed.
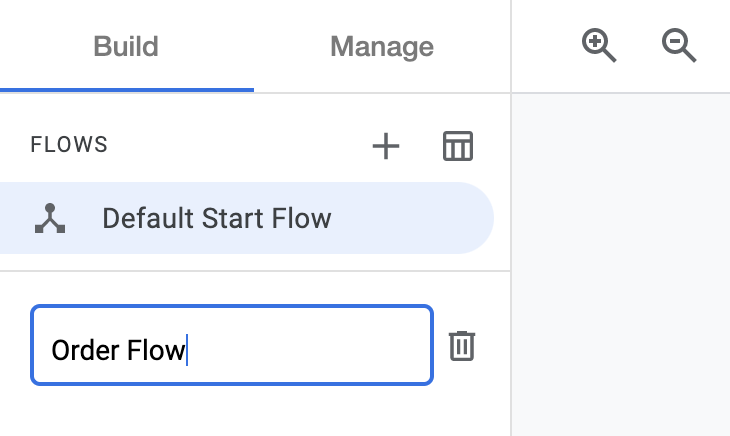
Let us identify the required flows. As we are keeping it very simple for now, we will be needing only Default Start Flow and Order Flow.
In advanced use cases, we may need payment flow to take order payment. Similarly, we can add more flow as we add logically separated features.
Let’s create an Order flow
Create Intents
Intents are actual user intentions that the Voicebot would hear while taking an order. For example, being a user, you would like to say “Hi” to the bot or want to place an order by saying, “Let me have an Espresso with Honey”.
As of today, all chatbot providers like Dialogflow, Amazon Lex are only providing support for one Intent at a time.
Hence as per the best practice, while identifying a list of Intents for the project, you should keep in mind not to mix multiple Intents.
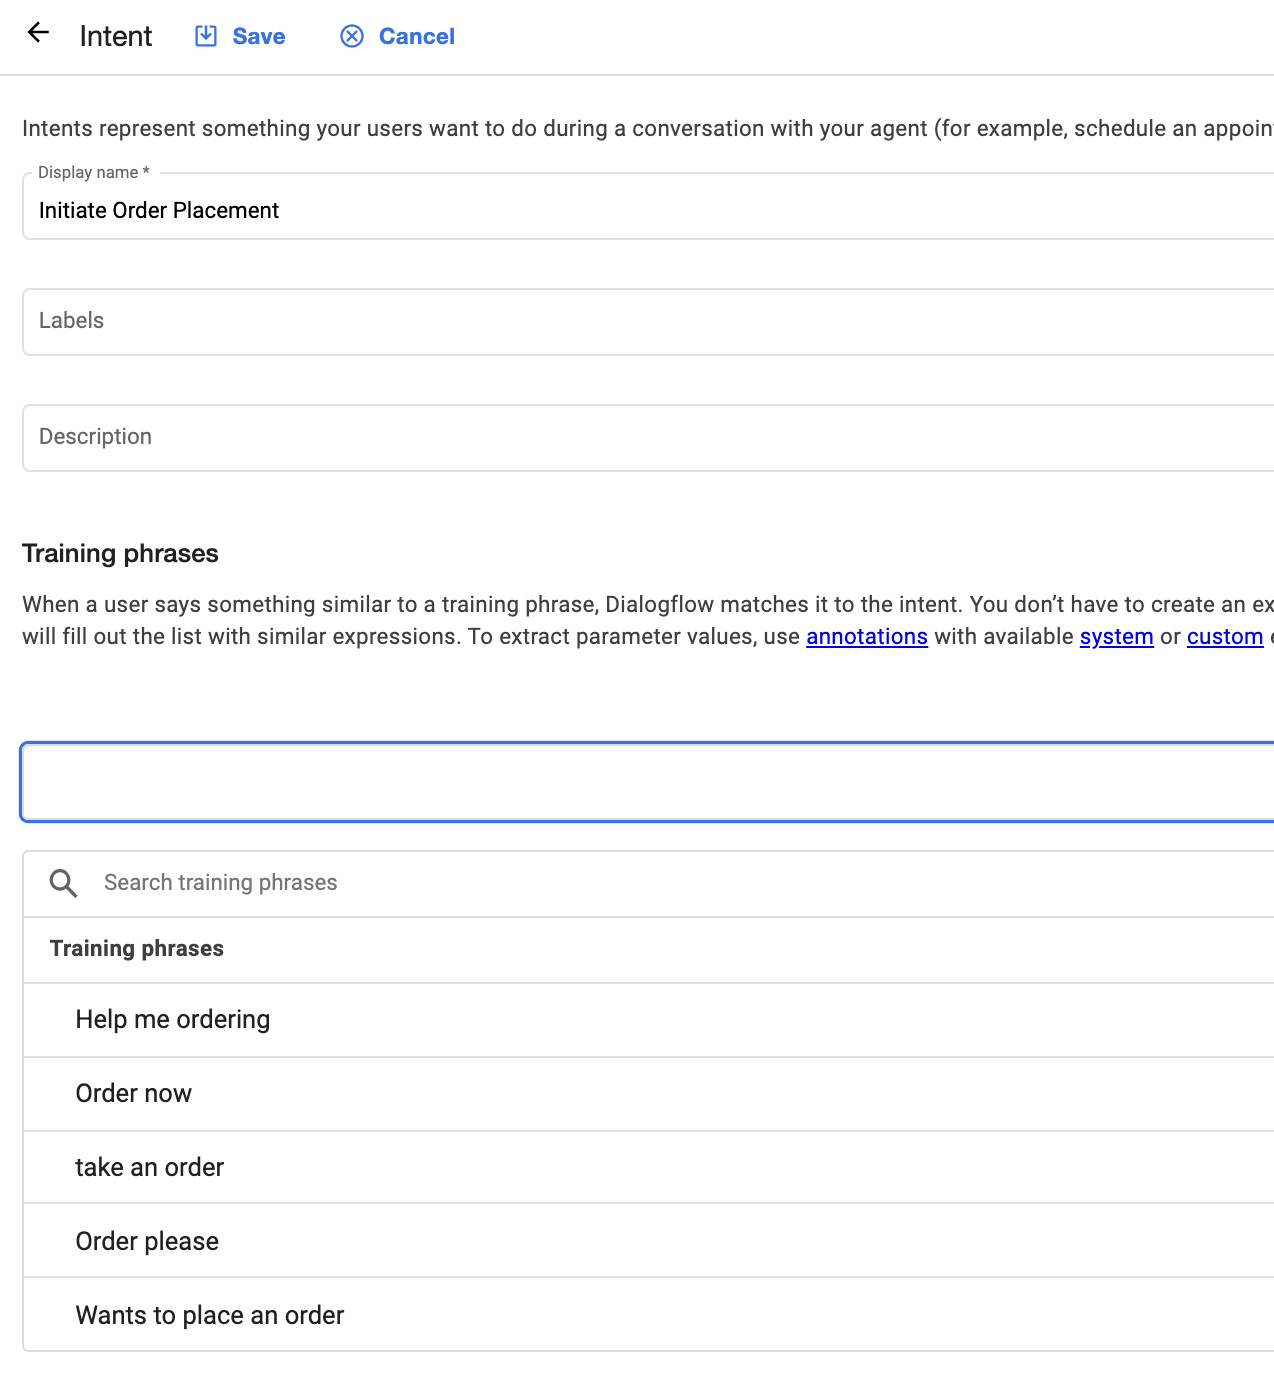
While creating Intents, you need to provide a list of possible phrases which the end-user might use. For example, to initiate an order, the user might speak anything from the following but not limited to:
- Place an order
- Help me placing an order
- Take an order
- I want to place an order
- I would like to place an order
- …
List of intents we need today,
- Initiate the Order
2. Order placement
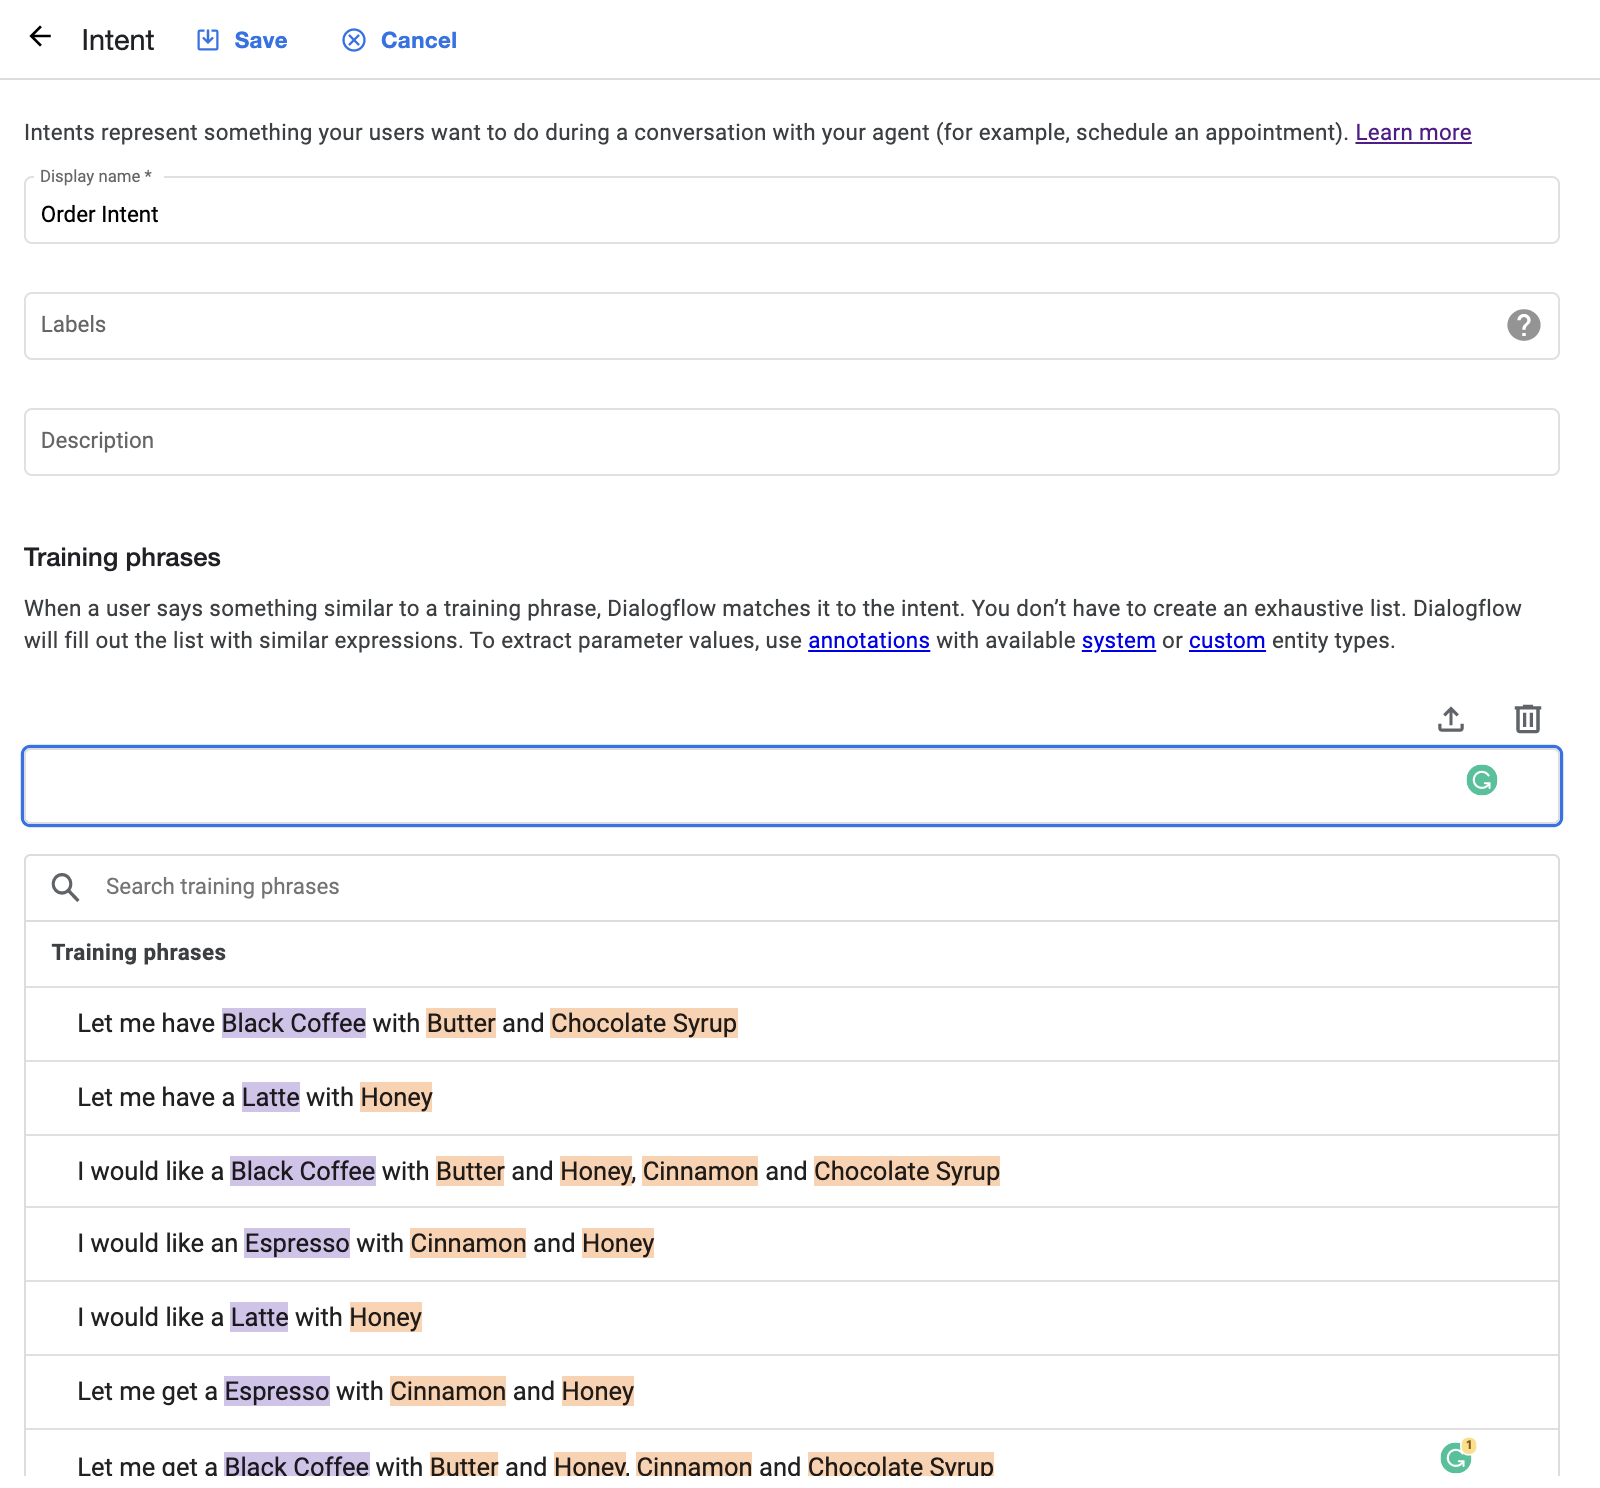
Few examples, how a user may place an order:
- Let me get an Espresso with Honey
- Let me have a Black Coffee with Butter and Honey, Cinnamon and Chocolate Syrup
- I would like an Espresso with Cinnamon and Honey
Ideally, Dialogflow would automatically identify the Entities used in the Intent and tag them. However, if it is not detected automatically, we can select the word and then the Entity.
You can see in the following screenshot, Dialogflow has automatically identified coffee types and toppings.
You must have observed that toppings can be more than one. So while placing an order, we would require an array of toppings which we need to inform Dialogflow by mentioning that toppings as “List” of items.
Routing
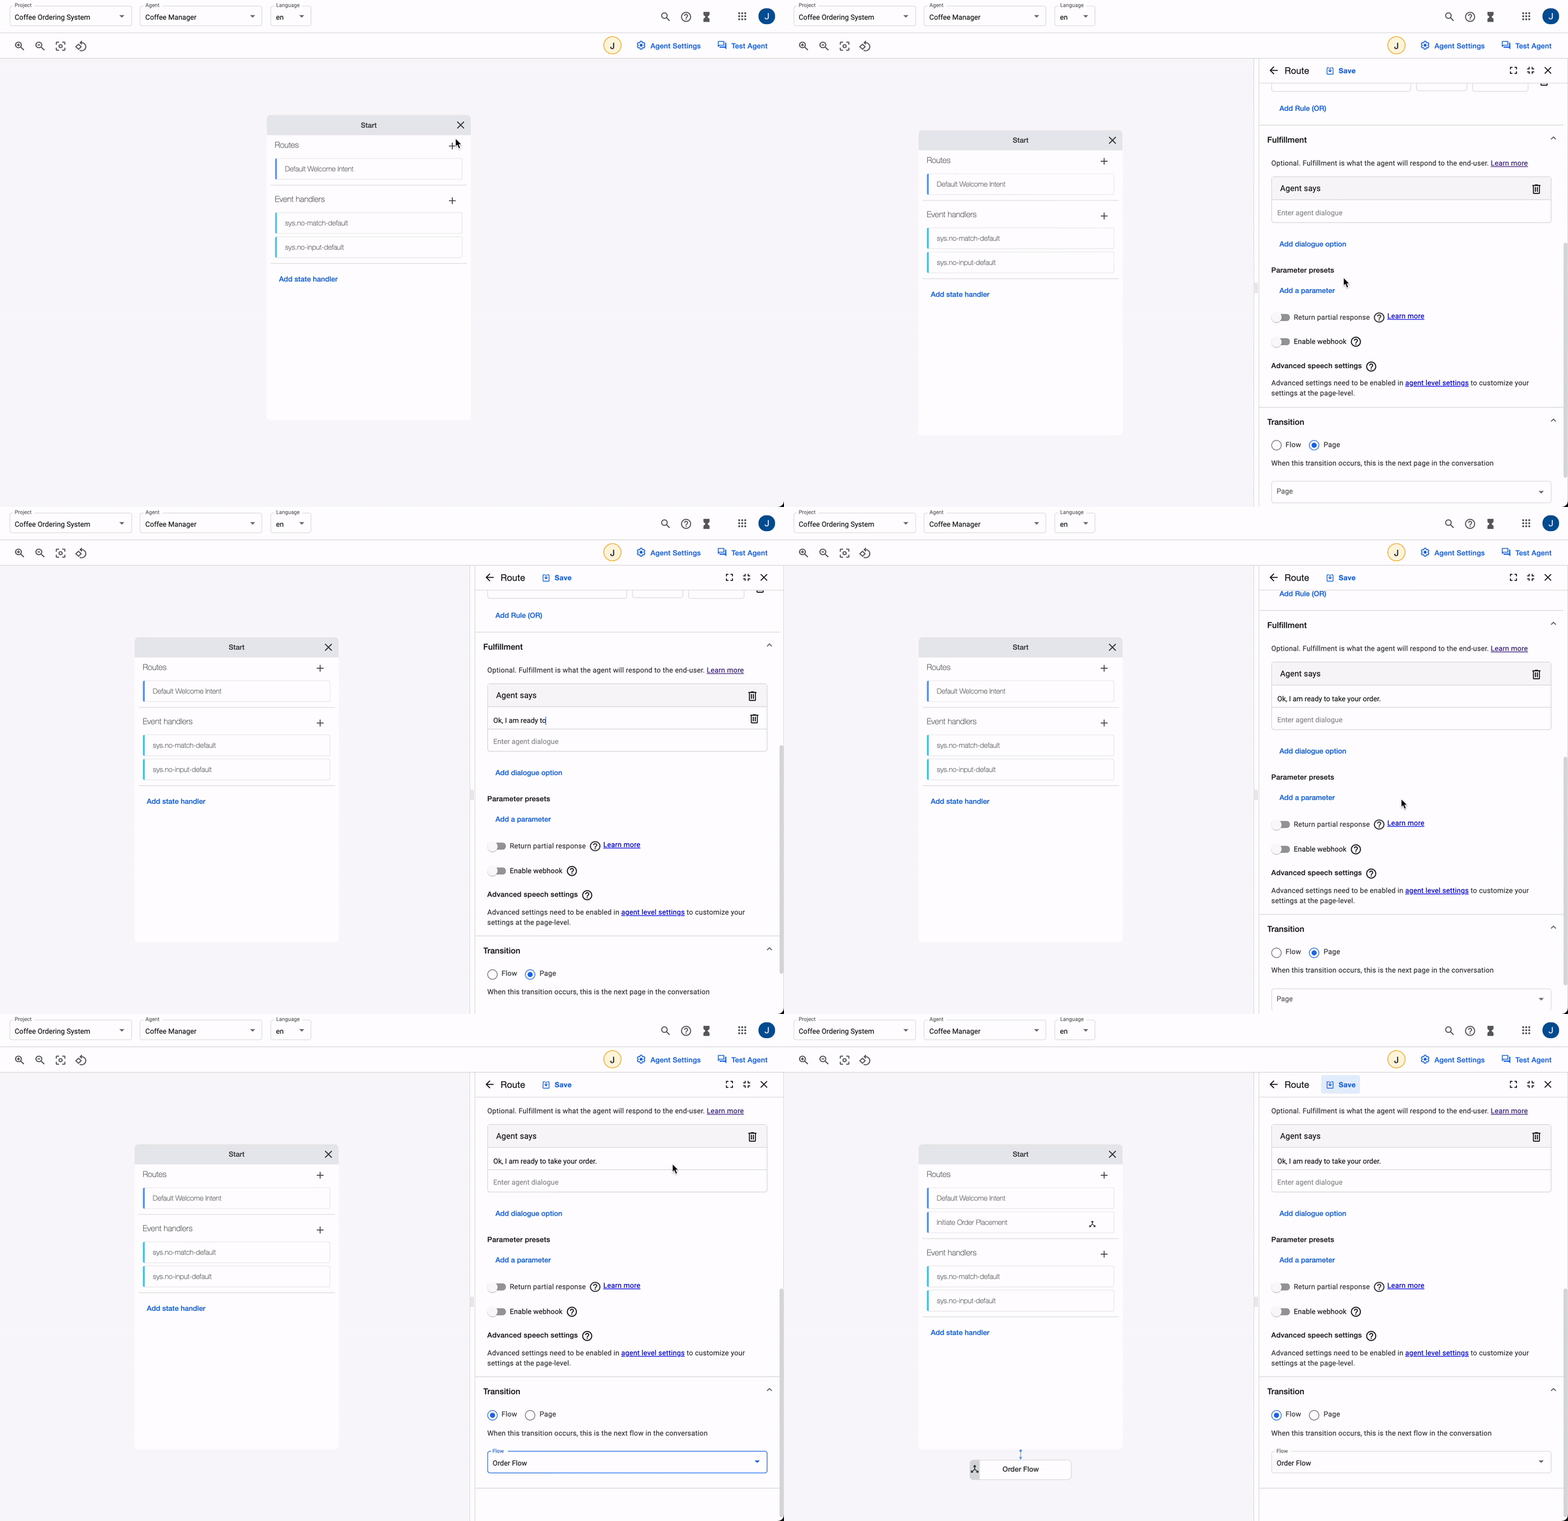
Routing, in Dialogflow, is used to traverse between Pages and Flows. We have already defined Intents and Flows, so let’s connect the dots now!
Order initiation
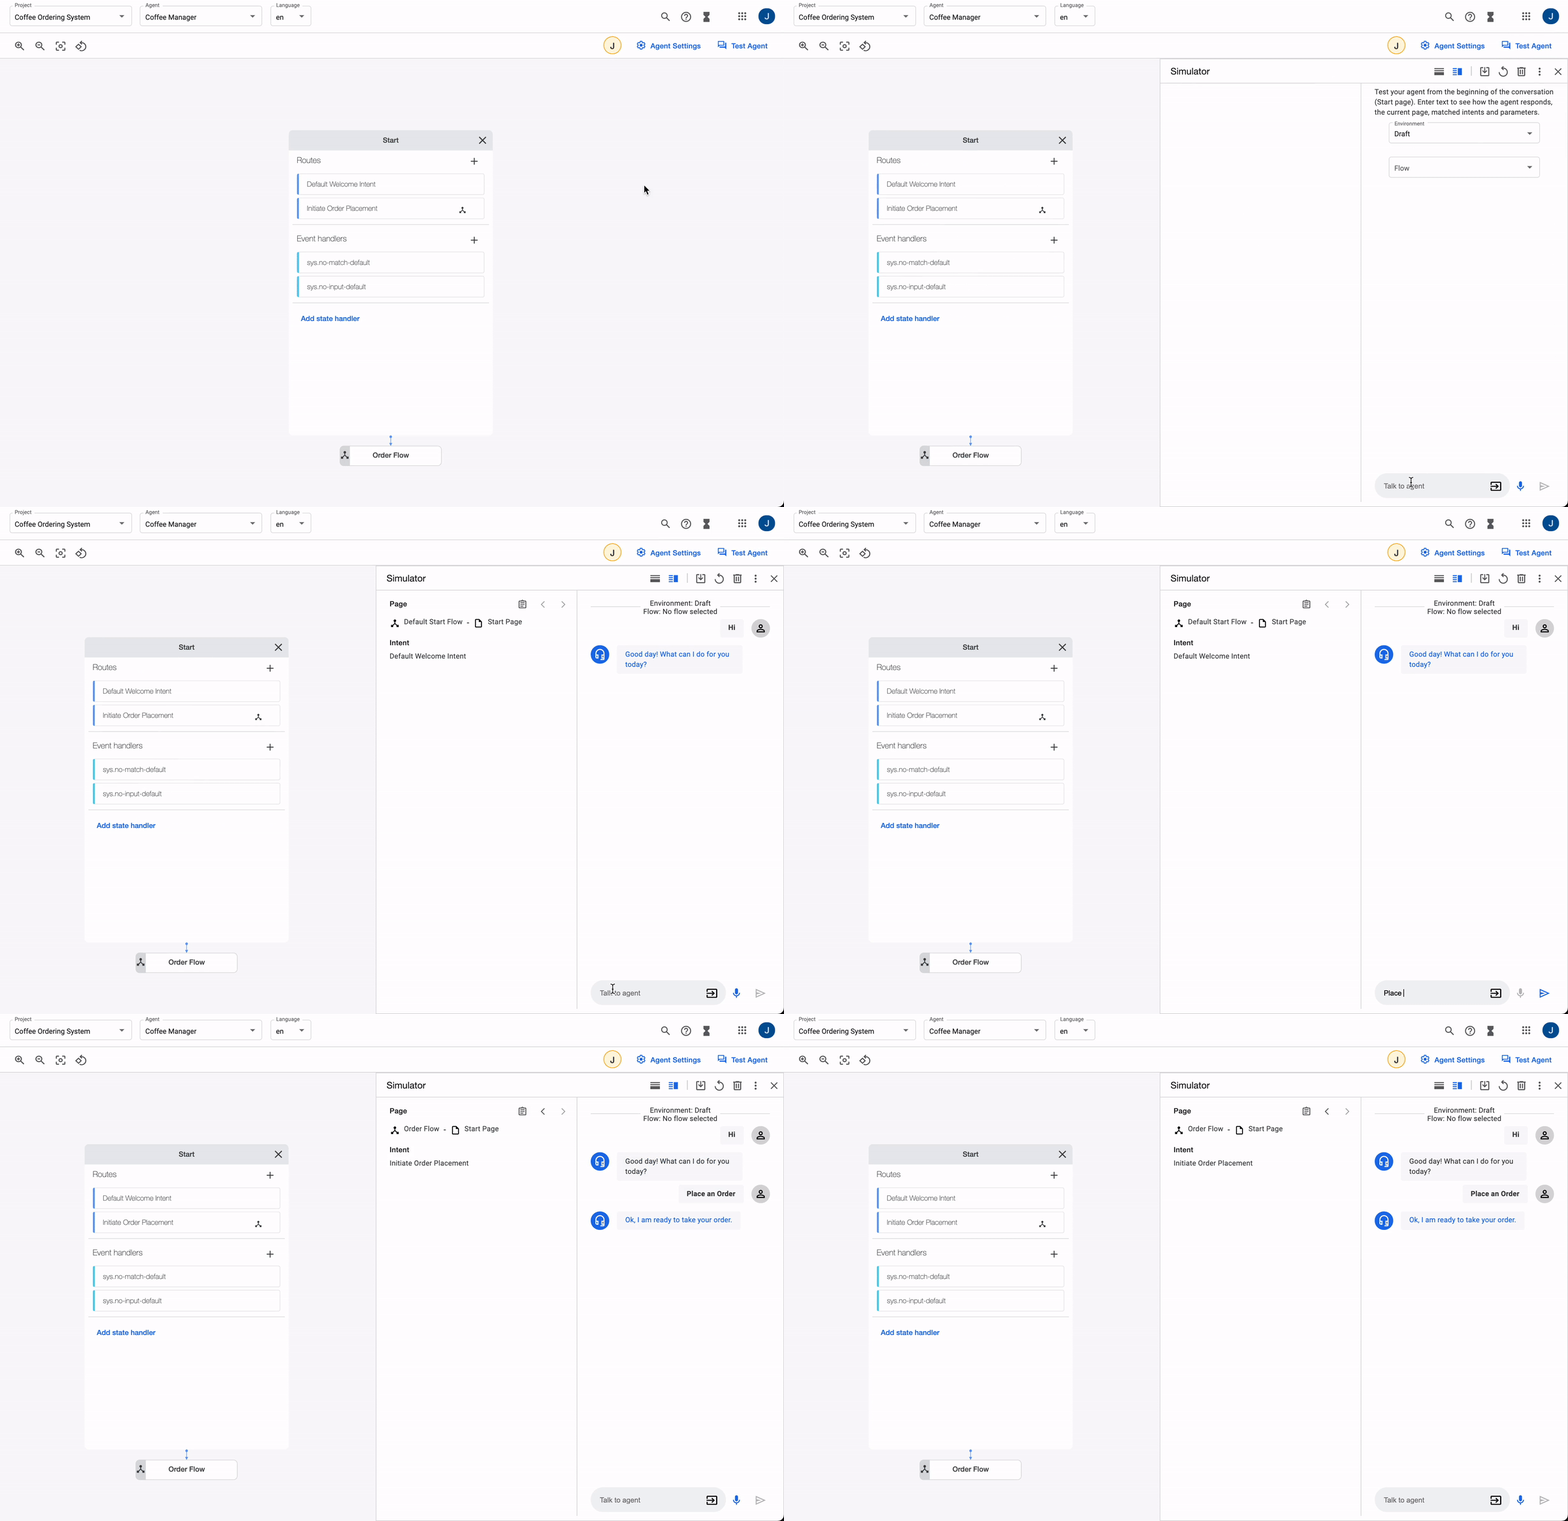
Starting from Default Start Flow, we need to route the flow to Order Flow, if the user intends to initiate the order.
Let’s create a new route, select the Intent, and redirect it to the Order Flow.
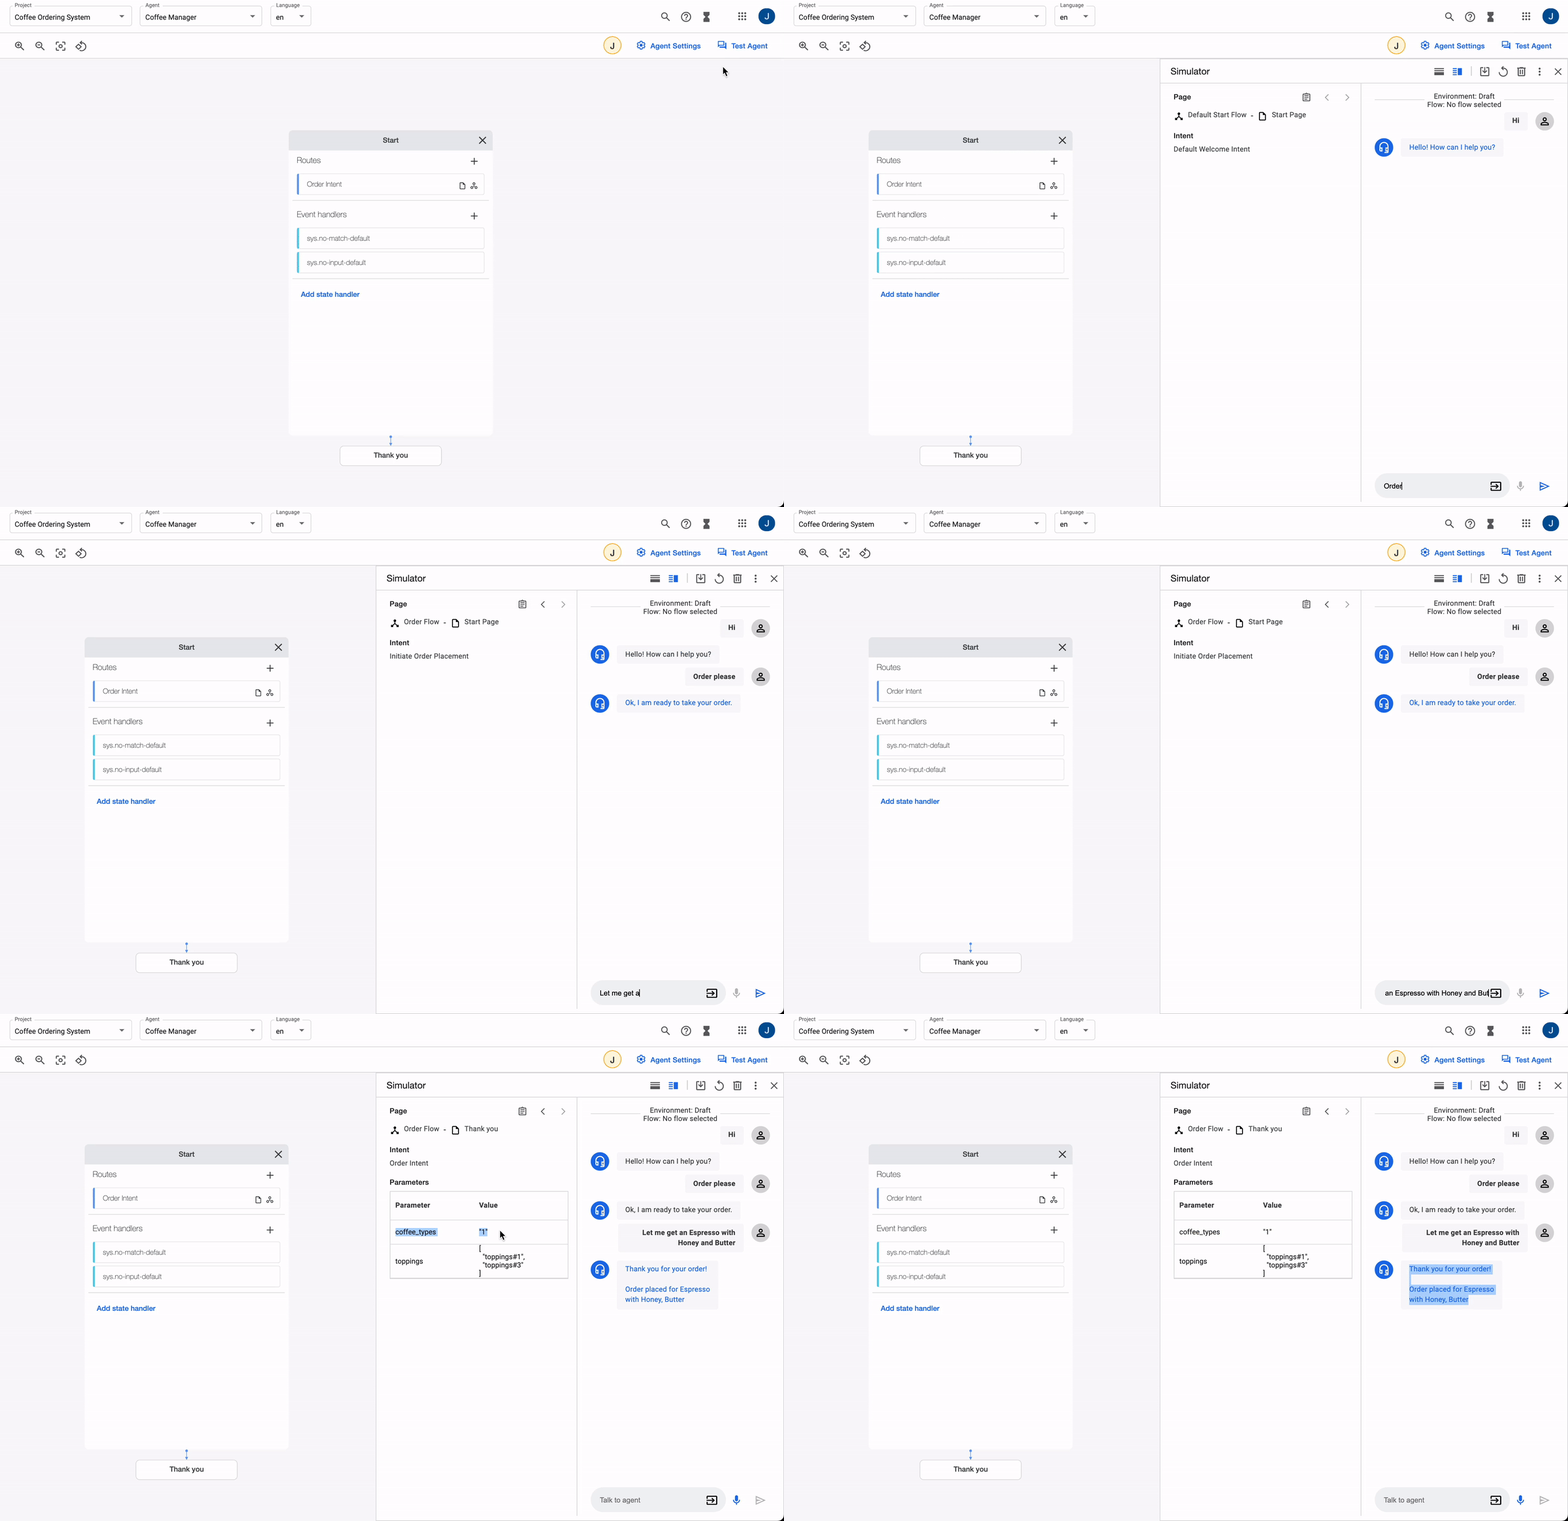
Let’s test!
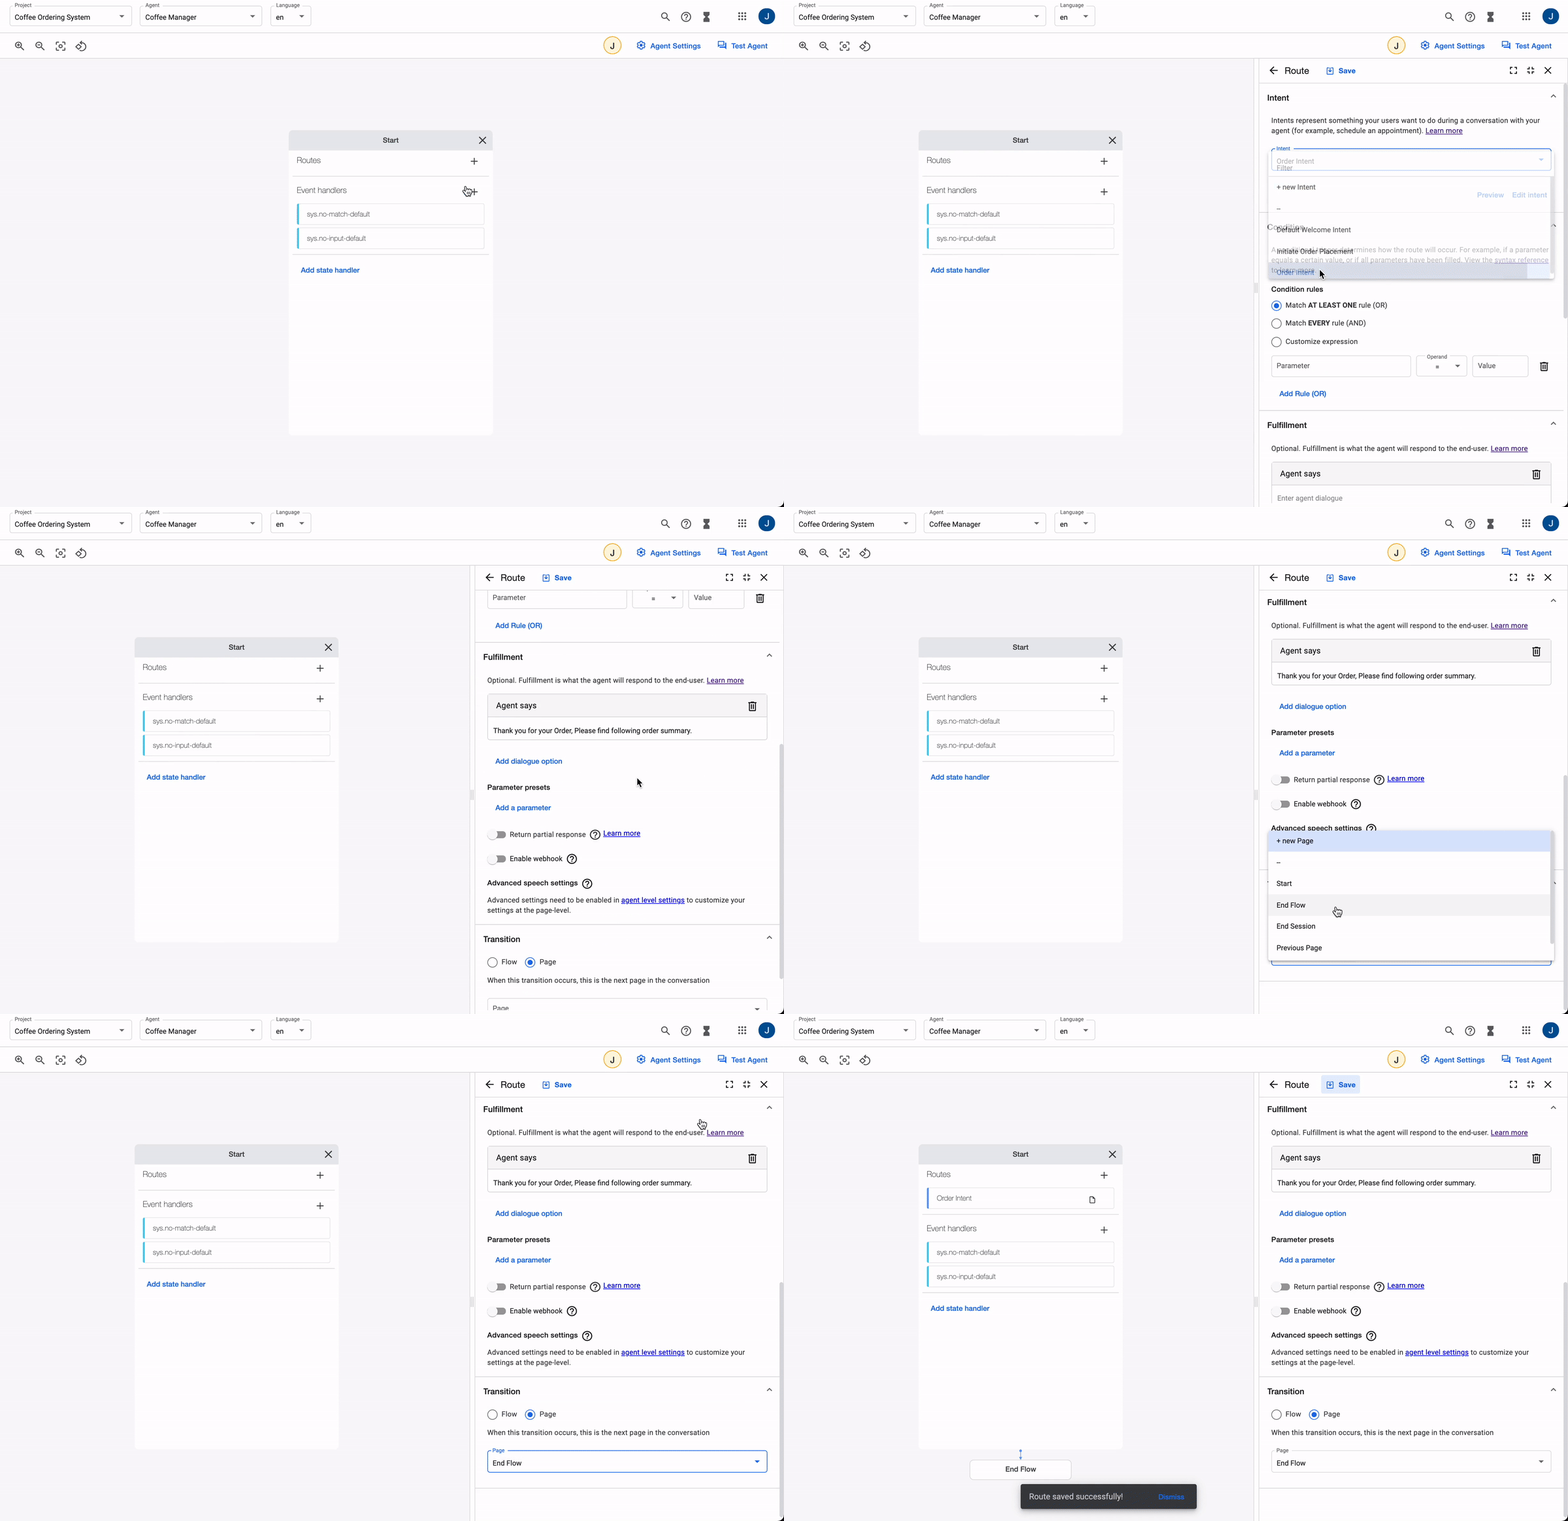
Order placement
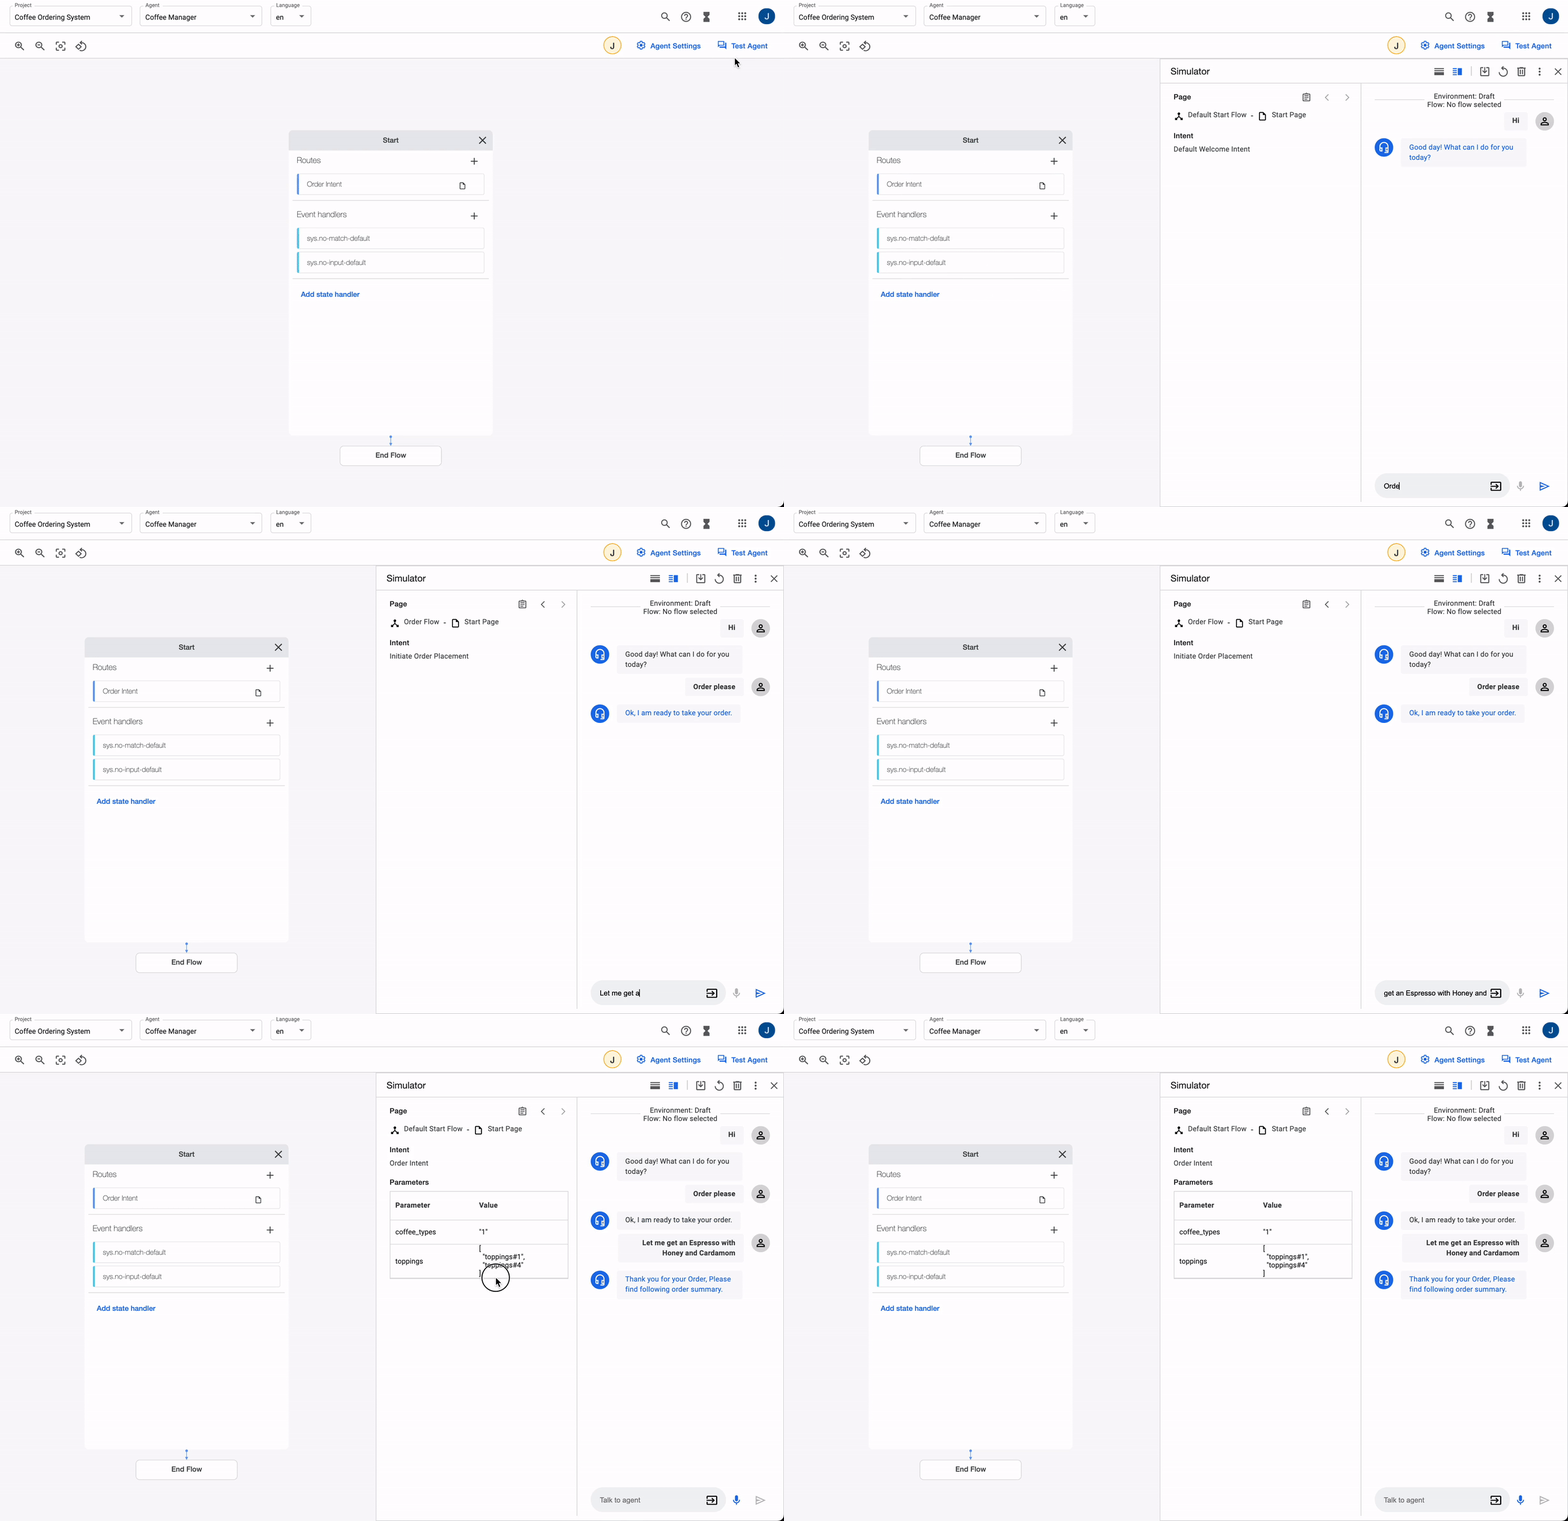
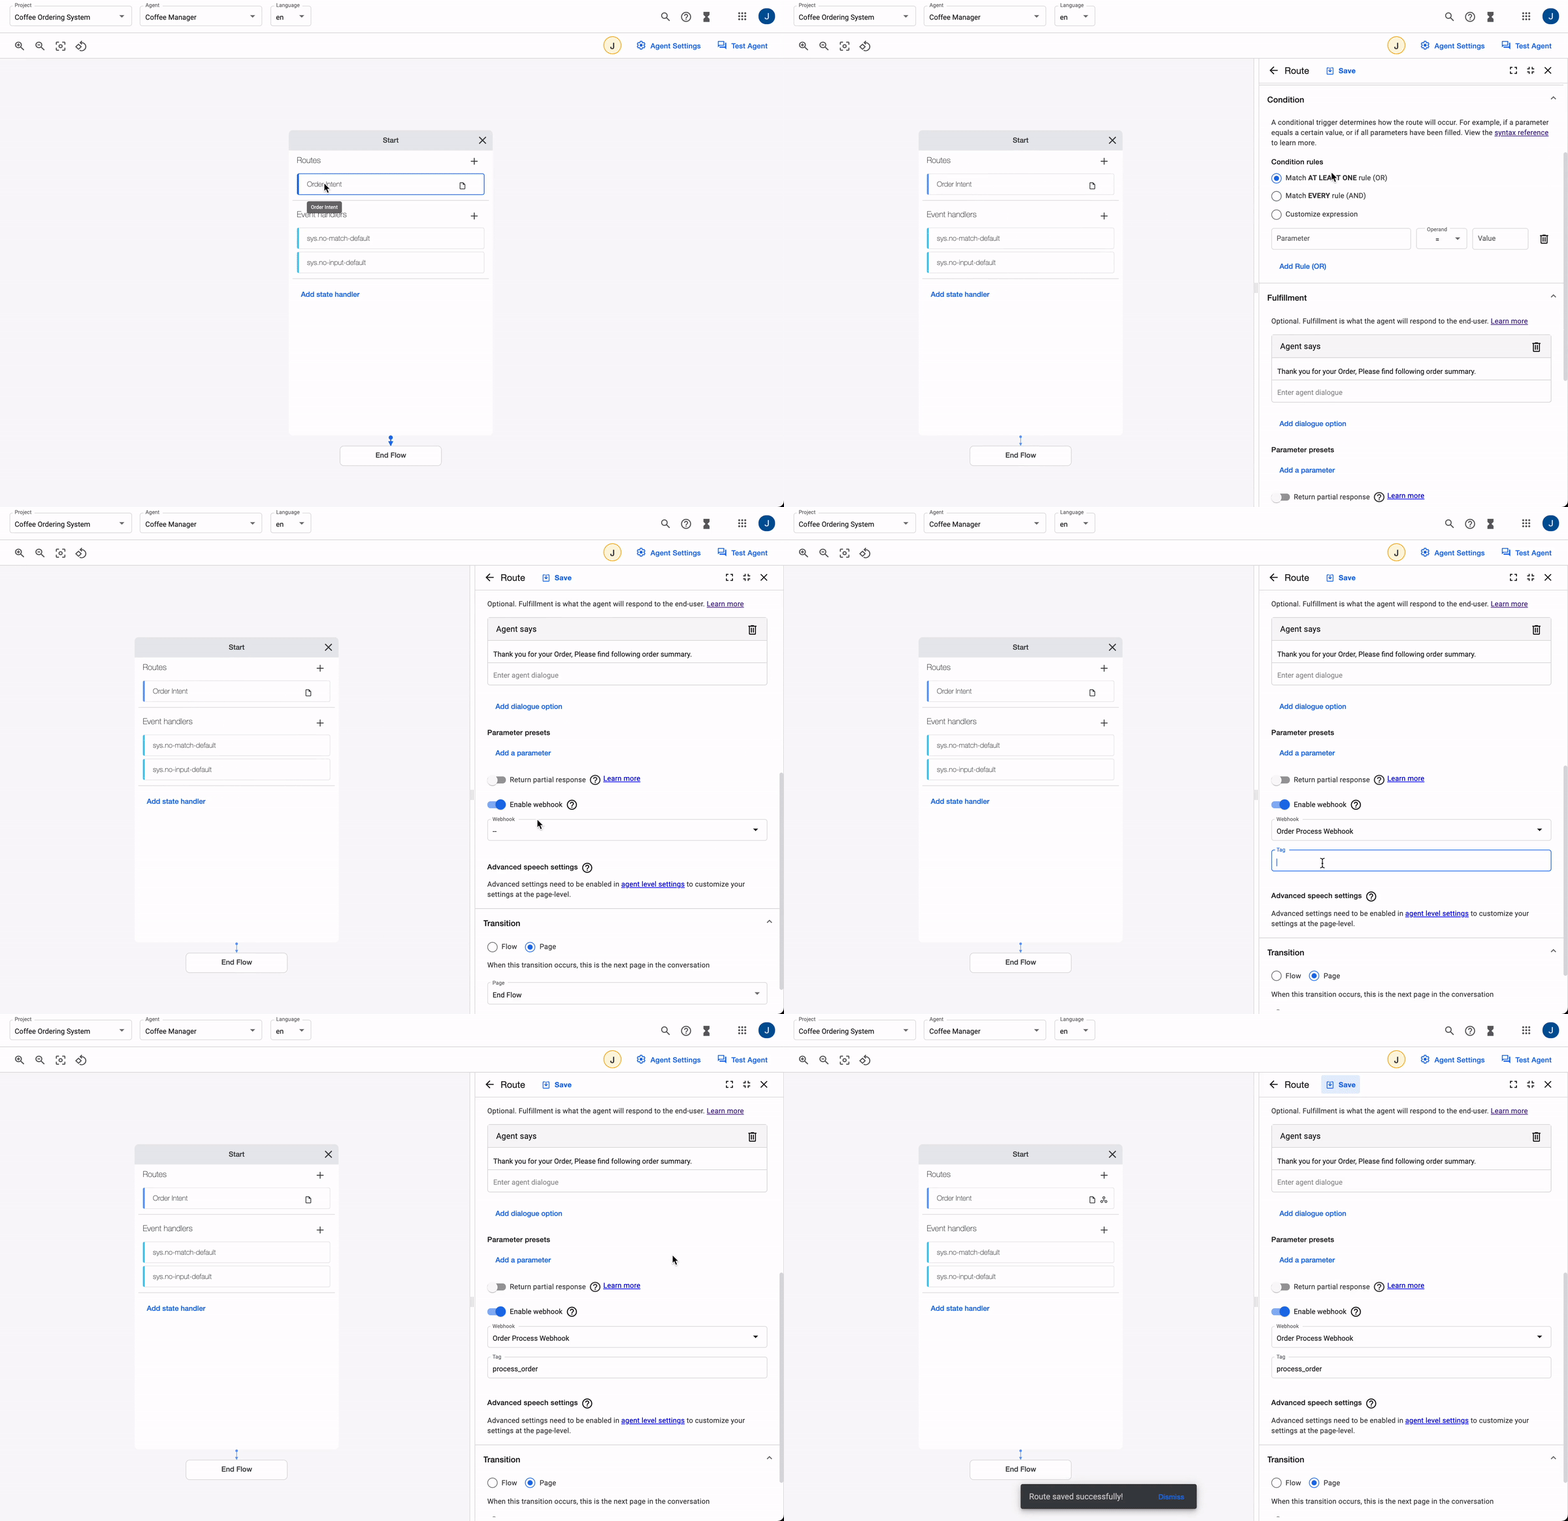
Navigate to the newly created Order Flow and create a route for order placement. It should redirect towards ending the flow. (End Flow - comes out of the box)
Let’s test!
Webhook for Order placement
Webhooks are like plugs between Dialogflow and your backend systems. We can expose backend systems over Google Functions or REST APIs, which we configure as Webhook in Dialogflow.
In our use case, once we have information from the user about the coffee, we need to provide the same to the backend to process the order.
Following is a very simple Node/Express example,
public webhookManager = async (req: Request, res: Response) =undefined {

       const { text, transcript, sessionInfo, fulfillmentInfo, intentInfo } = req.body;

       const intent = text || transcript;


       const { coffee_types, toppings } = sessionInfo.parameters;


       const parsedItem = this.coffees[(+coffee_types) - 1];

       const parsedToppigns = toppings.map((t) =undefined {

           const id = +t.replace("toppings#", "");

           return this.toppings[id - 1];

       });


       if (fulfillmentInfo.tag === "process_order") {

           const reply = {

               fulfillment_response: {

                   messages: [

                       {

                           text: {

                               text: [`Order placed for ${parsedItem} \n with ${parsedToppigns.join(", ")}`]

                           }

                       }

                   ]

               }

           };

           return res.status(200).json(reply);

       }

   }
Let’s configure the webhook.
Let’s test end-to-end flow!
Connect with AudioCodes
Let us convert your smart bot into a smart voice bot using AudioCodes!
AudioCodes helps you assign a phone number to your Dialogflow bot. So whenever your users call the number, it makes conversation with the Dialogflow.
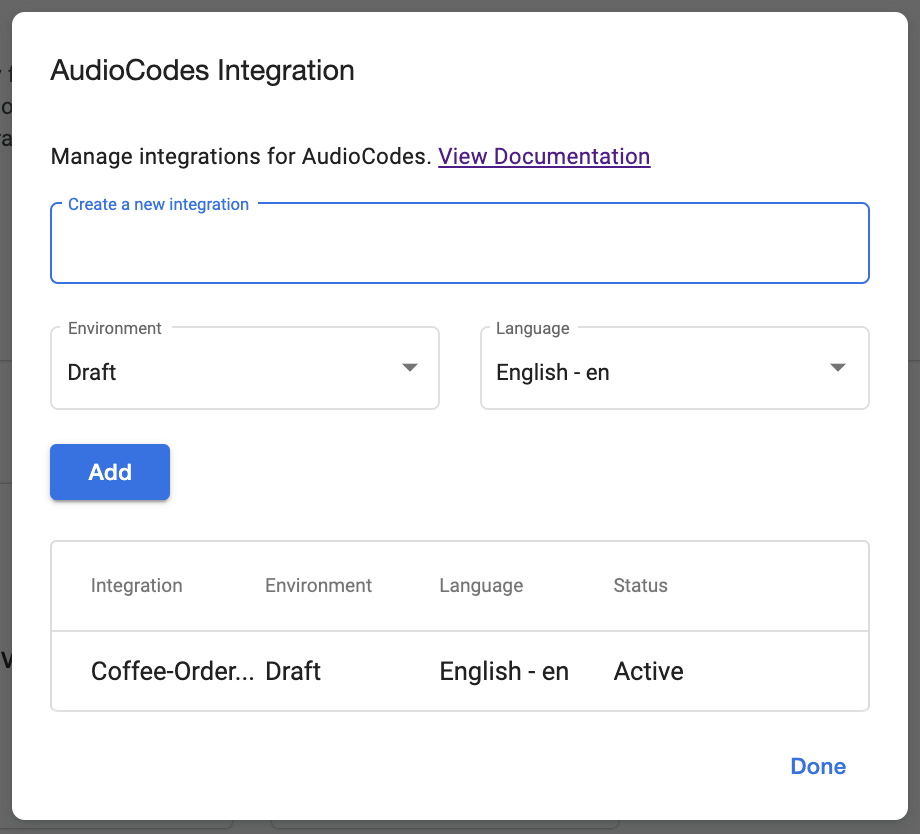
Dialogflow provides AudioCodes integration out of the box, which you can configure with just a few clicks. Go to the integration section and click on connect for AudioCodes. Then follow the steps further, and you'll be able to integrate it.
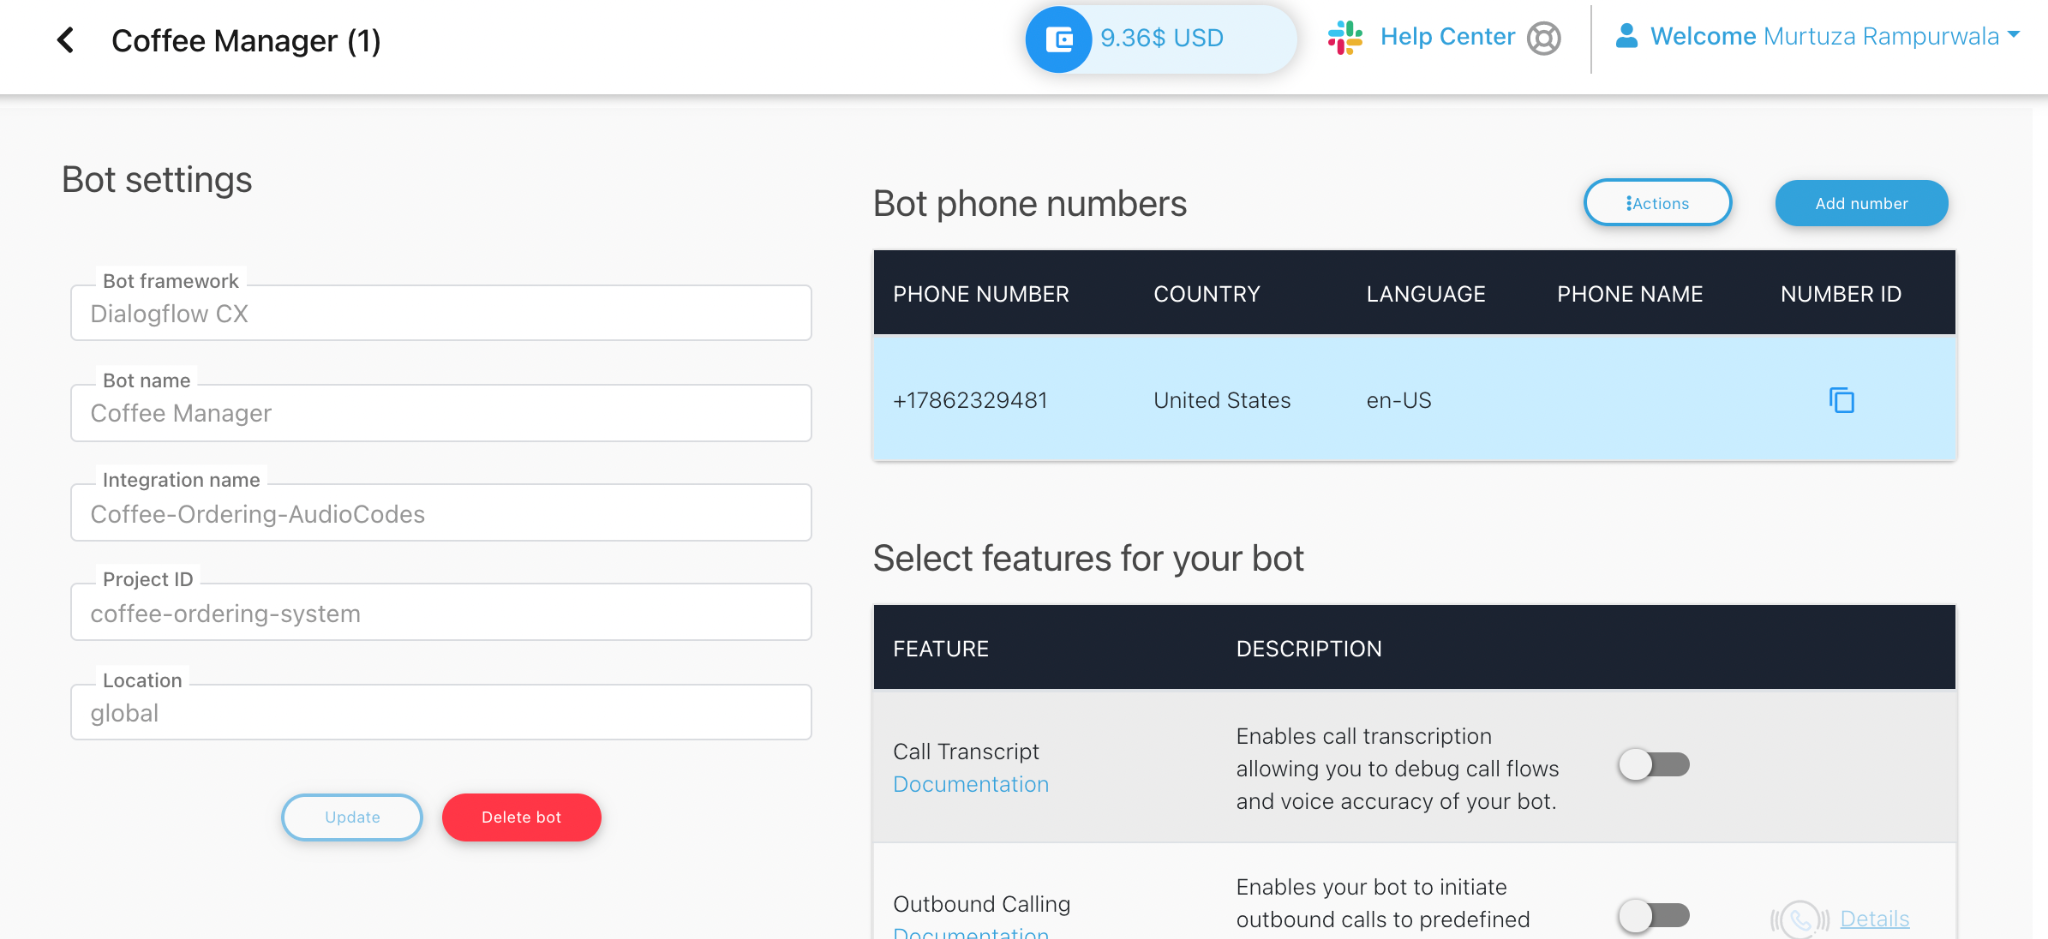
Once you connect Dialogflow with AudioCodes, add a Phone Number to your bot from the AudioCodes portal.
Make a call to the number and give it a try!
Conclusion
Now that you've understood how to create a Voicebot for ordering a coffee using Dialogflow CX, try it out for your list of items, maybe for food or grocery, or any other e-commerce catalog. Scale it according to your list of items, and give your customers a rich experience.
Here are some advantages of using a Voicebot ordering system:
- Growth in the number of orders as multiple customers can be attended simultaneously
- Reduction in average response time
- Same Voicebot can also be used for solving customer queries with a little modification
- It is available 24/7 without any supervision
We, at Seaflux, are AI undefined Machine Learning enthusiast who is helping enterprises worldwide. Have a query or want to discuss AI or Machine Learning projects? Schedule a meeting with us here, we'll be happy to talk to you!

Jay Mehta
Director of Engineering


